
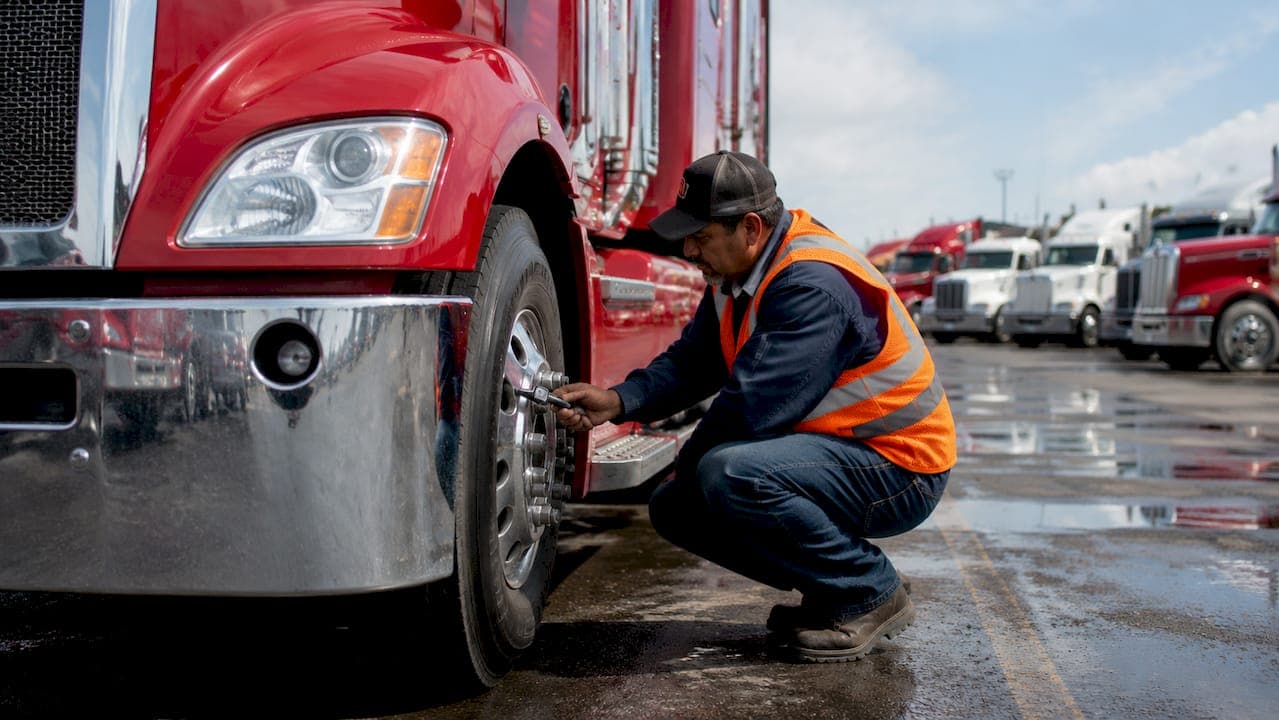
A semi truck inspection checklist is a structured, ordered list of inspection points covering the tractor and trailer to verify safe operating condition as required by FMCSA regulations before every trip. Under 49 CFR 392.7 and 396.13, drivers must inspect 11 core categories before operating a commercial vehicle. Brake defects cause 41% of all out-of-service orders, with tires and lighting rounding out the top three failure areas. A thorough pre-trip inspection list is not optional paperwork. It is your primary defense against roadside violations, costly breakdowns, and accidents.
1. What does a semi truck inspection checklist cover?
A complete vehicle safety checklist covers both the tractor and trailer across seven defined inspection zones. FMCSA regulations require drivers to verify brakes, steering, lighting, tires, coupling devices, and more before departure. Skipping any zone creates gaps that DOT inspectors will find.
The seven zones are: engine compartment, cab interior, front wheels and brakes, driver side, passenger side and coupling, trailer, and cargo securement. Each zone targets a specific set of components. Working through them in order prevents you from doubling back or missing items.

Zone-by-zone summary:
| Zone | Critical checks |
|---|---|
| Engine compartment | Fluid levels, belts, hoses, leaks |
| Cab interior | Gauges, mirrors, seat belt, horn, wipers |
| Front wheels and brakes | Brake pads, lug nuts, hub seals, tires |
| Driver side | Fuel tank, exhaust, frame, lights |
| Passenger side and coupling | Fifth wheel, air lines, electrical connections |
| Trailer | Brakes, lights, doors, landing gear |
| Cargo securement | Tie-downs, load distribution, placards |
Pro Tip: Walk the same path around the truck every single time. A consistent route turns the inspection into muscle memory and makes it harder to skip a zone under time pressure.
2. How to perform a pre-trip air brake system test
The air brake test is the most technical part of any truck inspection guide, and it is also the most commonly failed step during roadside DOT inspections. An 8-step air brake test sequence is the standard procedure for CDL compliance and roadside safety. Skipping or rushing this test leaves the most critical safety system unverified.
Follow this sequence before every trip:
- Build air pressure. Start the engine and let pressure build to governor cutoff, typically 120–125 psi.
- Turn off the engine. All subsequent tests run with the engine off.
- Check static pressure. Note the gauge reading. Pressure should hold steady.
- Perform the leak-down test. Release the brakes and monitor the gauge for 1 minute. Loss should not exceed 2 psi for single vehicles or 3 psi for combination vehicles.
- Test the low-pressure warning. Fan the brakes down to approximately 60 psi. The warning light and buzzer must activate.
- Check spring brake pop-out. Continue fanning the brakes. Spring brakes must engage between 20 and 45 psi.
- Test the parking brake. Apply the parking brake and attempt to move the vehicle in low gear. The vehicle must not move.
- Test service brakes. At 5 mph, apply firm brake pressure. Check for pulling, delayed response, or unusual noise.
Pro Tip: Carry a small notepad and record your starting and ending psi during the leak-down test. If the numbers creep worse over several days, you have a developing leak before it becomes a violation.
3. What are the most common defects found during inspections?
CVSA inspectors examined 56,178 vehicles during a recent inspection blitz, placing 18.1% out of service. Brakes accounted for 41% of those violations, tires for 21.4%, and lighting failures for 11%. These three categories alone represent nearly three-quarters of all OOS orders.
Understanding why these defects occur helps you catch them before a DOT officer does. Brake violations typically stem from worn pads, out-of-adjustment slack adjusters, or air leaks at the chamber. Tire violations come from underinflation, tread depth below the legal minimum, or sidewall damage. Lighting failures are often as simple as a burned-out marker bulb or a corroded trailer plug.
Top 5 inspection misses that lead to OOS violations:
- Brake adjustment. Slack adjusters out of spec are the single largest OOS cause. Check pushrod travel at each axle.
- Trailer lighting. Marker lights and brake lights on the trailer fail more often than tractor lights due to connector corrosion.
- Tire inflation. A tire can lose significant pressure without looking visibly flat. Use a calibrated gauge, not a kick.
- Coupling security. A loose fifth wheel or improperly latched kingpin creates a catastrophic separation risk.
- Cargo securement. Missing or damaged tie-downs violate 49 CFR 393 and trigger immediate OOS orders.
Trailers account for the majority of combination vehicle roadside violations. Drivers who rush the trailer portion of their walk-around pay for it at the scale.
4. How to document inspections and why DVIR compliance matters
The Driver Vehicle Inspection Report, known as the DVIR, is the written record that proves you performed your inspection. DVIR documentation serves as legal evidence of due diligence during audits and liability claims. Without it, you have no defense if a defect is later cited as the cause of an accident.
FMCSA requires drivers to complete a DVIR at the end of each day. The report must identify the vehicle, list any defects found, and confirm the vehicle is safe to operate. A motor carrier must certify repairs before the next driver takes the truck.
DVIR best practices for drivers and fleet managers:
- Complete the report every day, even if no defects are found. A "no defects" entry is still a required entry.
- Be specific about defects. "Brake issue" is not sufficient. Write "right rear brake chamber air leak, audible at rest."
- Review the previous driver's DVIR before your pre-trip. If a defect was noted and not repaired, you are responsible for flagging it again.
- Keep records for at least 90 days. FMCSA requires carriers to retain DVIRs for a minimum of 3 months.
- Use digital DVIR apps when your carrier permits them. Digital records are harder to lose and easier to retrieve during audits.
Pre-trip and post-trip inspections serve different purposes. Pre-trip confirms readiness before departure. Post-trip flags new issues encountered on the route, giving the maintenance team advance notice before the next driver takes the truck.
5. How long should a proper pre-trip inspection take?
Experienced drivers complete thorough inspections in 15–20 minutes. Inspections completed in under 5 minutes are a primary indicator of skipped checklist items. The time difference between a rushed inspection and a thorough one is roughly 12 minutes. The cost difference between a clean roadside inspection and an OOS violation is measured in hours of lost time, fines, and potential liability.
The CDL pre-trip skills test covers more than 60 verbal demonstration points. Real-world inspections are broader. A driver who treats the CDL test as the ceiling rather than the floor will consistently miss items that matter on the road.
Fleet managers should build inspection time into dispatch schedules. Pressuring drivers to cut corners on pre-trip inspections shifts liability to the carrier and increases accident risk across the fleet.
6. How a consistent inspection route prevents missed items
Mandating a consistent walk-around path minimizes human error and increases inspection completeness. The "follow-the-truck" method means starting at the engine compartment, moving clockwise around the vehicle, and finishing at the cargo. Every driver on a fleet should follow the same route.
Consistency matters because memory is unreliable under fatigue or time pressure. A fixed route removes the decision of what to check next. It also makes it easier for fleet managers to audit inspection quality, since every driver's report should reflect the same sequence of checks.
A systematic 7-zone inspection method reduces fleet accident rates significantly. The benefit comes not from the zones themselves but from the discipline of following them without exception, regardless of weather, schedule pressure, or familiarity with the truck.
Pro Tip: If you are assigned a different truck than usual, add 5 extra minutes to your inspection. Unfamiliar equipment hides defects that your regular truck would not.
7. What to check on the trailer that most drivers overlook
Trailer inspections are frequently neglected and represent the majority of OOS violations for combination vehicles. Drivers who spend 15 minutes on the tractor and 2 minutes on the trailer are inspecting the wrong end of the truck.
Focus on these trailer-specific items that generate the most violations:
- Trailer brake adjustment. Trailer brakes fall out of adjustment faster than tractor brakes due to higher load cycling. Check pushrod travel at every axle.
- Marker and brake lights. The trailer's 7-pin connector corrodes over time. Test every light function before departure, not just the running lights.
- Landing gear. Cracks, bent legs, or missing crank handles are OOS violations. Confirm the gear retracts fully and locks.
- Rear doors and seals. Damaged door seals allow cargo shift and moisture intrusion. Confirm latches engage fully.
- Mud flaps. Missing or torn mud flaps are a ticketable violation in most states. They take 30 seconds to check.
Pre-trip inspections prevent an estimated 14,000 accidents annually by catching defects before departure. Most of those prevented accidents trace back to trailer components that a thorough inspection would have flagged.
Key takeaways
A complete semi truck inspection checklist, executed in 15–20 minutes across all seven zones, is the single most effective tool for preventing OOS violations, accidents, and liability exposure.
| Point | Details |
|---|---|
| Brakes are the top OOS cause | Brake defects account for 41% of out-of-service orders; check adjustment and air pressure every trip. |
| Follow the 7-zone method | A consistent walk-around path covering all zones reduces missed items and human error. |
| Air brake test requires 8 steps | Perform the full sequence with the engine off to verify leak-down rate, warning systems, and spring brakes. |
| DVIR is a legal requirement | Complete a Driver Vehicle Inspection Report daily; retain records for at least 90 days. |
| Trailer checks prevent most violations | Trailer brakes and lighting generate the majority of combination vehicle OOS orders. |
Why I think most drivers are inspecting the wrong half of their truck
After years of watching roadside inspection data and talking with fleet managers, one pattern stands out clearly. Drivers treat the tractor as the truck and the trailer as an afterthought. The tractor gets 12 minutes of attention. The trailer gets a glance and a kick of the tires.
The data does not support that habit. Trailers generate the majority of combination vehicle OOS violations. Trailer brake adjustment and lighting failures are the two most cited issues at the roadside. Yet the average pre-trip inspection routine spends the least time on the component that fails the most.
My recommendation is to flip the mental model. Start your inspection at the trailer. Give it the same systematic attention you give the engine compartment. By the time you reach the tractor, you will have already addressed the highest-risk area.
The other habit worth breaking is treating the DVIR as a formality. Drivers who write vague entries like "brakes OK" are not protecting themselves. They are creating a paper trail that looks like they did not look closely. Specific, detailed entries are what hold up in court and what keep auditors satisfied.
Consistency and specificity are the two habits that separate drivers with clean inspection records from those who collect violations. Neither requires extra equipment or extra time. They just require discipline.
— Dave
Sostruckforsale.com and your next well-maintained truck
Finding a truck that starts its life with you in good mechanical condition matters as much as the inspection routine you build around it. Sostruckforsale.com lists semi trucks for sale from verified sellers across the country, giving fleet managers and owner-operators access to equipment that meets commercial standards from day one.
Whether you are replacing aging equipment that keeps generating inspection failures or expanding your fleet with reliable units, Sostruckforsale.com provides the inventory to make that decision with confidence. Browse current listings at sostruckforsale.com and find trucks that are ready to work.
FAQ
What is a semi truck inspection checklist?
A semi truck inspection checklist is a structured list of components a driver must verify before operating a commercial vehicle, as required by FMCSA under 49 CFR 392.7. It covers brakes, tires, lights, steering, coupling devices, and cargo securement across both the tractor and trailer.
How long does a pre-trip inspection take?
A thorough pre-trip inspection takes 15–20 minutes. Inspections completed in under 5 minutes are a strong indicator that checklist items were skipped.
What are the most common DOT inspection violations?
Brake defects cause 41% of out-of-service orders, followed by tire violations at 21.4% and lighting failures at 11%, based on 2025 CVSA inspection data.
What is a DVIR and who must complete it?
A DVIR, or Driver Vehicle Inspection Report, is a written record required by FMCSA that documents any defects found during inspection. Every commercial driver must complete one at the end of each driving day, and carriers must retain the records for at least 90 days.
Do I need to inspect the trailer separately from the tractor?
Yes. Trailers must be inspected as thoroughly as the tractor. Trailer brakes and lighting generate the majority of combination vehicle out-of-service violations, making the trailer inspection one of the highest-priority steps in any vehicle safety checklist.