
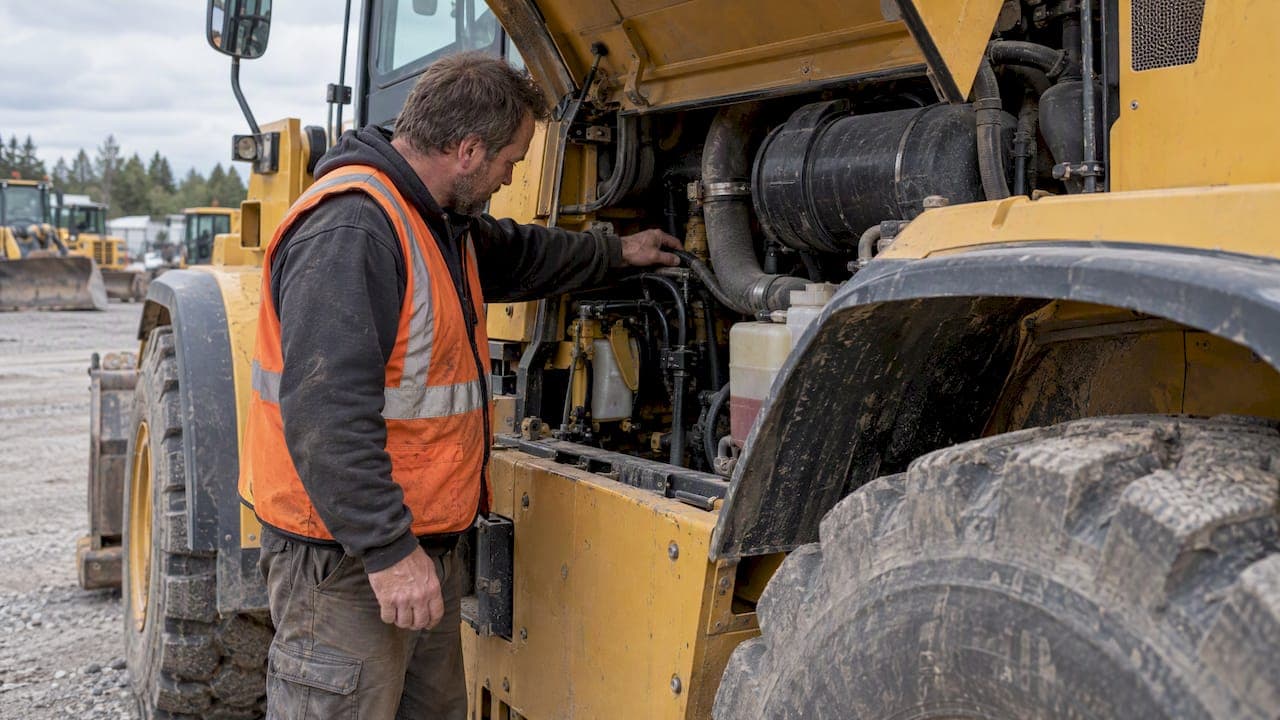
Before buying a used wheel loader, check for three deal-breakers first: major frame cracks or weld repairs, excessive articulation play, and signs of engine or transmission trouble. Beyond that, a systematic walk-around, fluid checks or lab samples, a service-history review, and a short test drive will tell you whether the machine deserves serious money. Below, we walk through each step, including a printable checklist you can bring to the viewing.
TL;DR:
- Inspect the articulation joint, loader arm mounts, and counterweight attachment for frame cracks; fresh welds or paint can conceal earlier repairs.
- Cycle the bucket and lift arms through their full range twice, then check for visible pin play, elongated holes, bends, or crooked cylinder rods.
- Test drive with the engine cold when possible, checking hydraulic response, steering, brakes, transmission shifts, smoke, and temperature; pause for slippage or rising coolant temperature.
- For small wheel loaders, Caterpillar recommends oil and filter changes roughly every 500 hours; compare service records with meter readings and question unexplained gaps.
- Send oil samples for laboratory analysis to detect contamination and wear; seek a mechanic’s inspection for smoke, contaminated fluids, or sluggish hydraulics.
Table of Contents
- Walk-Around Inspection: Systematic External Checks and Red Flags
- Major Components: Bucket, Lift Arms, Pins, and Bushings
- Engine Bay and Fluids: What to Check and When to Test
- Structural and Driveline Wear: Pivot, Frame, Axles, Differentials
- Test Drive and Operational Checks: Step-by-Step On-Site Tests
- Maintenance and Service History: Documents to Request and How to Read Them
- Cab and Safety Equipment: ROPS, Controls, and Operator Station
- Printable On-Site Inspection Checklist and Negotiating Tips
- What Sellers Leave Out, and How Buyers Catch It
- Find and Evaluate Used Wheel Loaders on Our Marketplace
- FAQ
- Sources
Walk-Around Inspection: Systematic External Checks and Red Flags
A disciplined walk-around catches most of what matters before you ever touch a wrench or start the engine. Work the machine in a fixed order so you don't skip a panel or a pivot point.
- Front end: check the bucket, lift arms, and front tires for wear, cracks, or uneven contact patterns.
- Left side: inspect the cab step, left tire and rim, hydraulic lines, and visible frame welds.
- Rear: look at the counterweight, rear tires, exhaust, and any attachment points.
- Right side: mirror the left-side check and compare wear patterns between both sides.
- Undercarriage: scan for oil staining, bent guards, or impact damage.
- Engine bay top and cab access: check hinges, latches, and grab handles for wear or looseness.
Exterior condition often tells you more than the seller's pitch. Paint sprayed over serial plates or warning labels, heavy grease buildup around joints, missing fasteners, or fresh welds on a frame that should be original all point toward a machine that has been patched rather than maintained.
Tires and rims deserve their own pass. Look for sidewall cuts, bulges, chunking, or uneven wear that suggests alignment or axle problems. Rim welds or patch repairs are a warning sign on a load-bearing wheel. While you're down there, check axle seals and wheel-end areas for fresh oil weeping, since a slow leak there often means a seal replacement is coming soon.

Major Components: Bucket, Lift Arms, Pins, and Bushings
The bucket, lift arms, and pivot points drive most of the repair bills on a used loader, so they're worth slowing down for.
- Check the cutting edge and bucket teeth for wear patterns that match normal use rather than digging in abrasive or rocky material beyond the machine's rated use.
- Look closely at welds around the bucket and adapters for cracking, grinding marks, or repair beads that suggest prior failure.
- Inspect every pin and bushing joint visually for elongated holes, shiny wear marks, or play you can see with the arm raised and lowered slowly.
- Grab the bucket or arm and try to rock it side to side. Noticeable movement at a pin joint usually means the bushing is worn out.
- Check lift arms and linkage for visible bends, heat discoloration, or cylinder rods that aren't straight when extended.
Pin and bushing wear is one of the costliest repairs on a wheel loader because replacement often requires pressing out seized components and machining mating surfaces, a job that adds up quickly in labor alone. Cat's own guidance on pin and bearing maintenance recommends checking for damaged bolts, washers, and zerks and listening for unusual noise during operation, both useful habits during an inspection.
Pro Tip: Cycle the bucket and lift arms through their full range twice before you judge pin play; a cold, unmoved joint can feel tighter than it actually is.
Engine Bay and Fluids: What to Check and When to Test
Fluid condition tells you what's happening inside the engine and hydraulic system long before a problem shows up as a breakdown. Pull the dipstick and check oil color and smell: dark, gritty, or burnt-smelling oil suggests neglected change intervals or internal wear. Coolant should be clear and at the correct level, not cloudy, oily, or rust-colored. Hydraulic oil should be relatively clean, not milky or full of visible particulates.
Check the engine air filter, look for obvious leaks around hoses and seals, and inspect belts for cracking or glazing. Smoke at startup is a meaningful clue: blue smoke generally points to oil burning past worn rings or valve guides, while white smoke suggests coolant entering the combustion chamber, and both call for further diagnostic testing before you commit.

Cooling system failures account for a significant portion of engine downtime, which is why Cat recommends routine fluid analysis tied to service intervals. A Cat S•O•S or equivalent lab test can detect water, fuel dilution, and wear metals in oil samples, giving you a clearer internal picture than any visual check.
Structural and Driveline Wear: Pivot, Frame, Axles, Differentials
Structural problems are the most expensive to fix and the easiest to hide under a fresh coat of paint, so this section deserves careful attention.
- Check the frame near the articulation joint, loader arm mounts, and counterweight attachment, the areas most prone to cracking under repeated loading, as engineering research on heavy equipment wear and failure confirms is common in high-stress zones (IOP Conference Series).
- Grab the front and rear frame halves and try to move them side to side at the articulation pivot. Noticeable lateral play signals worn pins or bushings that predict costly repairs ahead.
- Inspect differentials and axle housings for oil staining, which often indicates a seal failure or a previous repair that wasn't fully resolved.
- Ask directly whether the axles or differentials have ever been rebuilt, and look for mismatched paint or fresh fasteners that suggest recent work.
A machine that's spent its life on abrasive job sites, such as gravel or demolition work, tends to show accelerated wear in exactly these areas, which is worth asking the seller about directly to understand how the site preparation impacted the machine's condition, as detailed in the guide to preparing land for construction.
Test Drive and Operational Checks: Step-by-Step On-Site Tests
A short test drive confirms what the static inspection only suggests. Run through this sequence with the engine cold if possible.
- Start the engine and watch for excessive smoke, rough idle, or hesitation before it settles.
- Let it warm up for a few minutes while listening for knocking, whining, or unusual vibration.
- Raise and lower the bucket under light load, checking hydraulic response speed and smoothness.
- Drive forward and reverse, testing steering response and brake feel at low speed.
- Shift through the transmission ranges and note any slipping, delay, or harsh engagement.
- Operate under moderate load and watch the temperature gauge for signs of overheating.
Blue or white smoke, slow hydraulic response, gear slippage, or rising coolant temperature are all reasons to pause and request a professional inspection before moving forward.
Maintenance and Service History: Documents to Request and How to Read Them
Paperwork either confirms or contradicts everything you just saw on the machine. Ask for:
- Complete service logs covering oil changes, filter replacements, and major repairs.
- Hour meter records that you can cross-check against the logged service dates.
- Repair invoices and part receipts for anything beyond routine maintenance.
- Any fluid-analysis reports, such as Cat S•O•S results, from prior service visits.
Compare the hours on the meter to the manufacturer's recommended intervals. Caterpillar's own maintenance schedules for small wheel loaders call for engine oil and filter changes roughly every 500 hours, with additional service items at 1,000, 1,500, and 2,000-hour marks, and some components rated out to 12,000 hours. A machine with thousands of hours and no matching service entries is a clear warning sign, as are large unexplained gaps between maintenance dates or undocumented major repairs.
Cab and Safety Equipment: ROPS, Controls, and Operator Station
The cab is where safety compliance and daily usability come together, and it's worth a close look before you sit down to drive.
- Inspect the rollover protection structure for dents, cracks, or repair welds, since any damage to the ROPS compromises the protection it's designed to provide.
- Check seat belt condition and confirm the mounting points are solid, not patched or re-drilled.
- Test every gauge, warning light, horn, and safety interlock, along with HVAC function and mirror adjustment for clear visibility.
- Confirm a fire extinguisher and first-aid kit are present and within any marked service dates.
Printable On-Site Inspection Checklist and Negotiating Tips
Bring a simple ordered list to the viewing: walk-around, major components, fluids, test drive, then paperwork. Photograph anything questionable, note the hour meter reading, and date your notes so they hold up in a negotiation.
- Document frame cracks, pin play, or fluid contamination with photos and hour readings.
- Use confirmed defects to request a price reduction or walk away if repairs outweigh the asking price.
- Order a professional mechanic inspection or fluid lab analysis when internal wear is suspected but not confirmed visually.
What Sellers Leave Out, and How Buyers Catch It
In our experience reviewing listings, sellers rarely mention pin play, coolant condition, or gaps in service records voluntarily, so the burden falls on you to ask directly and verify with your own eyes. A seller's own guide to selling a wheel loader shows how much photo documentation and honest hour-meter matching matter from the other side of the deal, which is exactly what you should be checking for as a buyer. When something doesn't add up, a lab fluid sample or a paid mechanic's opinion is cheap insurance against a far more expensive mistake.
— Dave
Find and Evaluate Used Wheel Loaders on Our Marketplace
Used wheel loaders are listed alongside construction equipment, trucks and trailers, and material handling machinery from various dealers and private sellers across multiple categories, allowing you to compare options in one place instead of chasing scattered listings.
Search current listings, contact sellers directly, and bring this checklist with you to every viewing. Start browsing available equipment on SoStruckForSale today.
FAQ
What should be included on a lift inspection list?
A lift inspection list should cover the bucket and lift arm welds, pin and bushing play, hydraulic cylinder condition, and hose or fitting leaks. It should also include a function test of the lift arms through their full range under light load to check for smooth, consistent hydraulic response.
How much is a wheel loader?
Pricing for a used wheel loader varies widely depending on size, hours, condition, and attachments, so there's no single fixed figure to quote. Browsing current listings on a marketplace like SoStruckForSale gives you a realistic sense of asking prices for comparable machines in your size class.
Do forklifts need to be inspected daily?
Daily pre-use inspections are standard practice for powered industrial equipment, including forklifts and wheel loaders, to catch developing problems before they become safety hazards. These checks typically cover fluid levels, tire condition, controls, and visible leaks, separate from the deeper pre-purchase inspection covered in this guide.
What should be included in the inspection checklist?
A thorough checklist covers the walk-around, major components like the bucket and pins, fluid condition, a test drive, and a full review of maintenance records. Confirming ROPS condition and seat belt integrity, as described on the rollover protection structure reference page, rounds out the safety side of the inspection.