
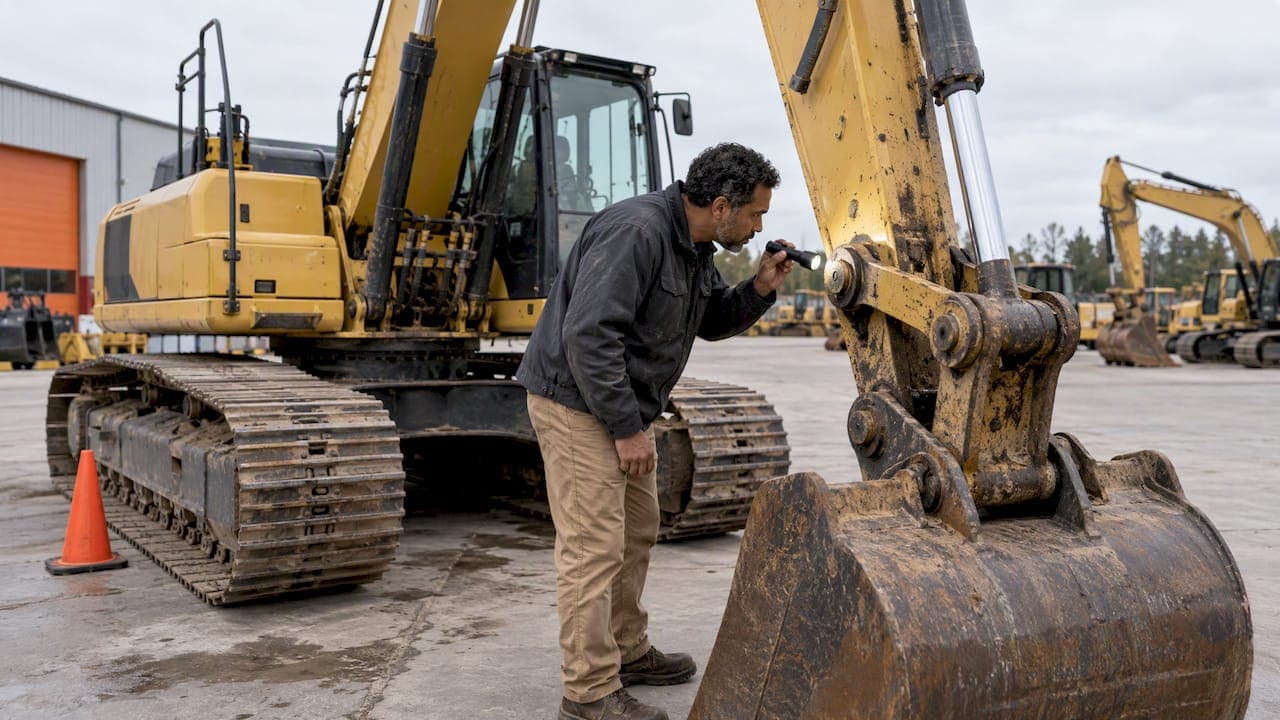
A used excavator inspection comes down to five checks, done in this order: paperwork, structure, undercarriage, hydraulics and engine, then a test under real load. Skip any one of them and you are guessing about a machine that can cost more than a house to repair. This guide gives you the sequence, the red flags and the point where you should stop and hire a professional.
TL;DR
- Verify the serial number and ownership paperwork before you look at the machine. A clean machine with a questionable identity is not a deal.
- Inspect cold. Check fluids, leaks, welds, pins and the undercarriage before the engine runs, then start it from cold.
- Test the excavator under load. Slow cycles, bogging and tracking drift only show up when the machine works.
- Treat the hour meter as one clue. Application history and maintenance records matter as much.
- For long-distance or high-value purchases, pay for an independent inspection before you wire funds.
Table of Contents
- Before you go: paperwork and questions for the seller
- Read the machine's history, not just the hour meter
- Start with the walkaround on a cold machine
- The undercarriage: where the money goes
- Hydraulics, engine and fluids
- Test under real load
- Prices, comps and what the inspection is worth
- When to hire a third-party inspector
- Used tractors and other farm machines
- Our perspective: what separates a good buy from a bad one
- Find your next excavator
- FAQ
- Sources
Before you go: paperwork and questions for the seller
The best inspection starts on the phone. Ask for the serial number, the maintenance records, the machine's work history and the reason for sale. A seller with real records answers quickly. A seller who stalls is telling you something.
Every excavator carries a unique product identification number or serial number. Equipment World reports it is typically on the outside right side of the cab near the floor. Match the plate to the paperwork, then confirm year, model and production history with the manufacturer or a dealer for that brand. Look for a plate that has been replaced, painted over or riveted on with fresh fasteners.
Ask these questions before you travel:
- What work has the machine done? Quarry, demolition, utility trenching or light residential work?
- Are service records available, and who performed the work?
- Has the hour meter, engine or any major component been replaced?
- Is the machine free of liens, and is the title or bill of sale in the seller's name?
- Can I see it cold, and can I run it under load?
The fifth question matters most. A seller who warms the machine up before you arrive can hide hard starting, smoke and noises. If you are working through ownership paperwork, our buyer and seller checklist for transferring excavator ownership covers what each side should hand over.
Read the machine's history, not just the hour meter
Hours are the number everyone quotes, and they are the least reliable number on the listing. An excavator's hour meter should be compared against telematics data, such as Cat Product Link or KOMTRAX, when the seller can provide it. Meter replacement happens, and a legitimate replacement should be documented.
Application history carries as much weight as hours. Experienced inspectors generally agree that a 3,000-hour machine from a harsh quarry can need more expensive repairs than a 6,000-hour machine from light residential work. Ask for photos of the machine on past jobs, and ask what attachments it ran. A hydraulic breaker used for years puts different stress on the boom, stick and pins than a bucket used for digging basements.

Service intervals also tell a story. Intervals are machine-specific and set in the manufacturer's operation and maintenance manual. On some small excavators, such as the Cat 313F L, which lists 500-hour greasing intervals for front linkages, the schedule is easy to compare against the records. If the seller's records show gaps much longer than the manual's schedule, price the machine accordingly.
Start with the walkaround on a cold machine
Bring a flashlight, a rag, a small mirror, a notepad and a phone for photos. Ask the seller to leave the machine parked on level ground and not run for several hours.
Check cleanliness with suspicion
A machine that is clean, tight and free of external leaks is a good sign. Iowa State University's guide to buying used machinery names that tightness as a primary indicator, and it also advises a healthy suspicion of fresh paint that may be masking welds or cracks.
A recent wash is not a red flag by itself. Sellers wash machines to show them well, and removing mud from heavy equipment properly is part of good presentation. The point is to know what a wash can hide. Mud-caked machines conceal leaks and cracks, while a freshly steam-cleaned engine bay can wipe away the evidence of a slow weep. Wipe a seal or fitting with a rag, then check it again after the test run. A fresh wet shine on a clean part tells you more than any photo.

Structure, welds and pins
Walk the full machine and look closely at the following:
- Boom, stick and bucket: cracks, dents, and weld repairs that look newer than the surrounding paint. Check the areas around cylinder mounts and the boom foot.
- Frame, blade and ROPS or cab structure: cracks in the frame, ROPS, boom, stick and blade welds are worth a closer look on compact machines in particular.
- Pins and bushings: grab the bucket and linkage by hand or with the machine's own power and look for slack. Visible gaps, shiny scoring and elongated holes mean wear that gets expensive to fix.
- Bucket teeth, cutting edge and side cutters: these are wear items, but heavy wear tells you about the work the machine did and what you will spend in the first year.
- Safety equipment: working lights, reverse alarm, emergency stop and a fire extinguisher. Missing items are a negotiating point and a compliance issue on many job sites.
The undercarriage: where the money goes
Undercarriage components are commonly cited as roughly half of an excavator's lifetime repair costs, so give them more time than any other section. Inspect them with the tracks on the ground and again with the machine lifted slightly on its boom and stick.
| Component | What to check | Red flag |
|---|---|---|
| Track chains and links | Pin and bushing wear, link height | Stretched chain, loose pins, cracked links |
| Sprockets | Tooth shape | Hooked or pointed teeth |
| Idlers and rollers | Rotation, leaks, flange wear | Seized rollers, oil seeping from seals |
| Track shoes | Bolts, cracks, grouser height | Missing bolts, worn-flat grousers |
| Final drives | Oil leaks, noise on travel | Grinding or whining, wet housings |
| Swing bearing | Play between house and undercarriage | Vertical movement, clunks, grinding |
For the swing bearing, independent inspectors recommend putting the bucket on the ground, raising the tracks slightly and watching for vertical movement between the house and the undercarriage. Excessive play, clunks or grinding point to major repairs. Add the cost of a replacement set of tracks or a swing bearing to your offer, or walk away if the seller will not discount.
Hydraulics, engine and fluids
Before you start the engine, check every fluid. Pull the dipstick and look at the color and smell of the oil. Check the coolant for oil contamination and the radiator for oil in the water. Ask whether you can collect an oil sample for lab analysis, which is the cheapest insurance you can buy on a six-figure purchase.
Walk the hydraulic system next. Inspection services list the same items again and again: oil leaks, hydraulic leaks, damp lines and fittings, and slack in pins. Look closely at:
- Cylinder rods for pitting, scoring or oil film at the seals
- Hoses for cracks, bulges, chafing and aftermarket clamps
- Fittings and the main pump area for damp spots and grime buildup
- The swing motor and travel motors for weeping
On the engine, open the compartment and look at the intake tract. Dust past the air filter points to previous filter failure, a sign of a so-called dusted engine and likely premature wear. Check belts, hoses and the air cleaner housing for signs of neglect.
Now start the engine cold. Listen at start, at idle and at shutdown. Watch for smoke on each of those three moments: blue suggests oil burning, black suggests fueling or air problems, and white that does not clear suggests coolant or fuel trouble. A strong engine starts promptly and settles into an even idle.
Test under real load
The most common mistake buyers make is skipping the working test. A machine can idle perfectly and still fail the moment it digs. Inspectors say the only way to reveal slow hydraulic cycles, engine bogging and tracking irregularities is to test the machine under actual load.
Ask the seller for a dig area with real material, or at least a pile or bank. Then run this sequence:
- Warm up the machine fully and watch gauges and warning lights.
- Cycle each function one at a time: boom up and down, stick in and out, bucket curl and dump, swing left and right.
- Combine functions. Swing while you boom up and curl. Weak pumps show up when two or three functions compete.
- Dig and lift. Fill the bucket and watch for engine bogging, jerky motion or slow cycles.
- Hold a load. Raise a loaded bucket and check for cylinder drift over several minutes.
- Travel forward and back, straight and while turning. The machine should track straight without pulling to one side.
- Shut down and inspect again for new leaks, then check temperatures by hand where it is safe to do so.
Take video of the whole test. If the machine passes, you have a record. If it fails, you have leverage.
Prices, comps and what the inspection is worth
None of this matters if you pay too much for a sound machine. Use the inspection findings to adjust your offer: price out worn tracks, a rebuild or a missing attachment, then compare against recent sale prices for the same model, year and hours. Our guide to heavy equipment pricing with auction comps walks through how to build that comparison. The inspection gives you a list of facts to bring to the negotiation, not just a yes or no.
If you also buy loaders or skid steers, the same logic applies. See our wheel loader inspection deal breakers and skid steer inspection guide for the checks specific to those machines.
When to hire a third-party inspector
Do your own walkaround first, then decide whether you need a professional. Hire one when:
- The machine is far away and you cannot travel to see it.
- The purchase is large enough that a hidden repair would hurt your business.
- You are not experienced with the brand or the machine's size class.
- The seller will not allow a full load test, oil sampling or records review.
The cost of an inspection is small next to the cost of a failed final drive or swing bearing. An independent inspection gives you a neutral written report with photos, which protects your money before you send it. Sellers who are confident in their machines rarely object. If a seller refuses an independent inspection outright, treat that as part of your answer.
Bring a mechanic you trust if you can. Dealers for the machine's brand can also read fault codes and confirm service history from their records.
Used tractors and other farm machines
Buyers searching for a pre-sale equipment inspection for a used tractor can use the same logic with different details. Start it cold, lift the hood, let it run and look for leaks from the engine, hoses and hydraulics. Check for cracked or worn hydraulic, coolant and fuel lines. Test the power take-off, the three-point hitch and the loader, if fitted, under load, and check tires and the transmission for slipping or noise. The Iowa State guide linked above also stresses tight gear operation and the lack of external leaks as signs of a well-kept machine.
Our perspective: what separates a good buy from a bad one
We run a marketplace where dealers and private sellers list trucks, excavators and other heavy equipment, and buyers read those listings and contact sellers directly. What we see is that the strongest listings and the best purchases have the same thing in common: documentation. A seller who lists the serial number, service records and clear photos of the undercarriage, pins and cab has already answered half of a buyer's questions.
Our advice to buyers is simple. Do not let a good photo set replace an inspection. Photos show you what the seller chose to show. Ask for what is missing: cold-start video, the underside of the machine, the engine bay, and the work history. Use the inspection to turn a listing price into a fair offer, and be willing to walk away when answers do not add up.
Our advice to sellers is the mirror image. Machines sell faster and with fewer disputes when the seller invites the inspection. If you are listing an excavator, our guide to photos and video that sell an excavator fast shows what a buyer wants to see before they call.
— Dave
Find your next excavator
Once you know what to check, you need machines worth checking. Sostruckforsale is an online marketplace of listings for construction equipment, trucks and trailers, material handling, agriculture, forestry and grounds care, which you can filter by category, price and country. Browse the listings at Sostruckforsale, contact the seller directly and take this checklist with you.
FAQ
What should a basic used excavator inspection include?
Cover paperwork and serial number, structure and welds, pins and bushings, undercarriage, hydraulics, engine and fluids, and a working test under load. Thorough checklists run to about 40 points. Do not skip the load test, because it reveals problems a static check cannot.
Where is the serial number on an excavator?
It is typically on the outside right side of the cab near the floor. Verify it against the manufacturer's records to confirm the machine's identity, year and production history. If the plate looks replaced or altered, ask the seller for an explanation in writing.
Are hours the most important number on a used excavator?
No. The hour meter is useful, but it can be replaced or tampered with, so compare it with telematics data if available. The type of work the machine did and its maintenance history often matter just as much.
Is a third-party inspection worth paying for?
For long-distance or high-value purchases, usually yes. An independent inspector gives you a neutral written assessment before you send funds. It costs far less than finding a failed swing bearing or final drive after delivery.
Sources
- Inspection checkpoint: how to inspect a used excavator, Equipment World
- Heavy Equipment Inspection
- Buying Used Machinery, Iowa State University
- Cat 313F L Small Excavators, Caterpillar
- Removing mud from heavy equipment